
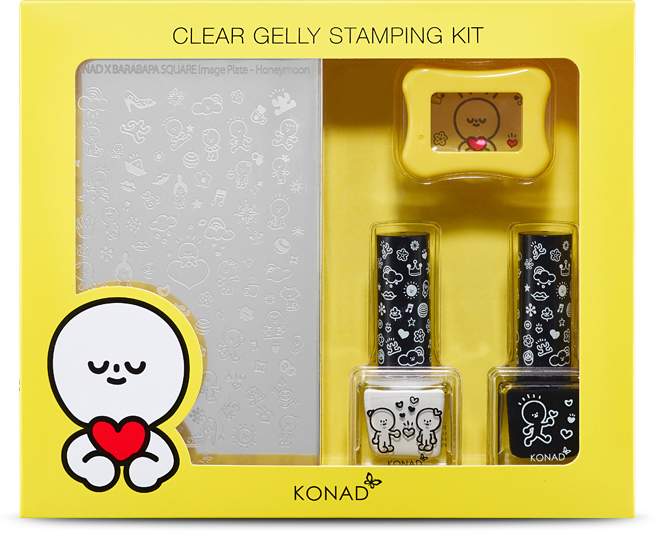
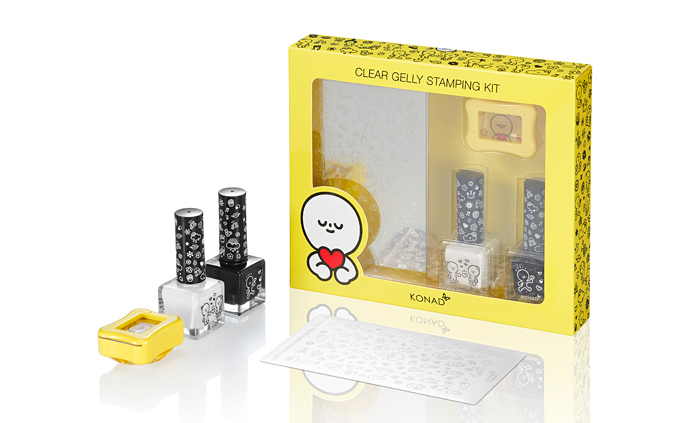
All
For nail art creation using stamping, use to rake special polish of image plate (scraper), and to print (stamp) images on nails.
Scraper: Blade that scratches pattem in 45 degree angle after putting special polish on image plate.
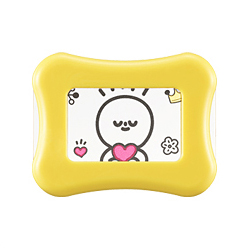
Stamp: Stamp is used to print on nails by stamping on images using scraper.
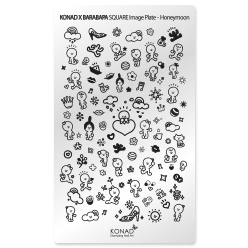
Nail art image plate that can express detailed parts impossible to draw manually, because of various images composition.
Since this polish is only for stamping should not be directly apply on nails, and specially manufactured for the expression of stamping nail art pattern. It features rapid drying speed, outstanding color formation, and pattern retaining ability.
How to use the stamping nail art (Polish)
How to use the stamping nail art (Gel Polish)
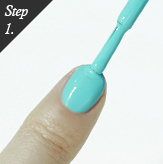
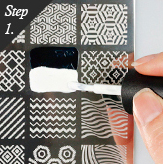
Apply the polish to your nails and let it dry(If stamping on a gel polish coated nail, cute it first and then wipe it with a gel cleanser so that no uncured gel remains.
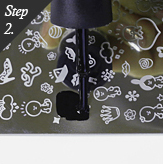
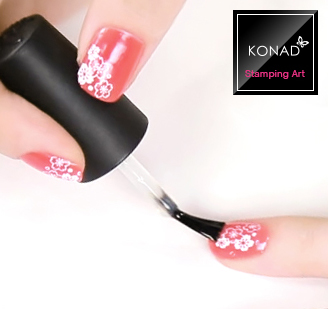
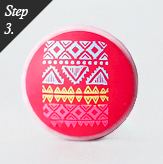
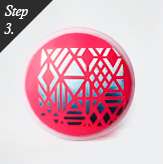
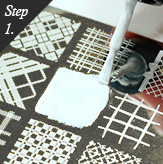
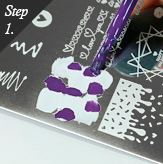
Apply the special nail polish on your desired image.
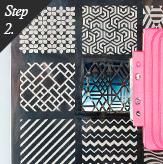
Erect the scraper at 45” and quickly scrape the covered polish from left to night.
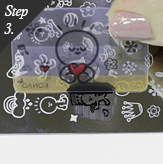
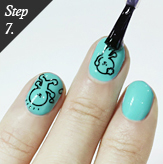
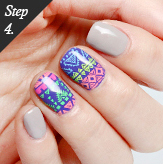
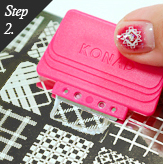
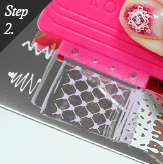
Immediately afterward, use the stamp to stamp your desired image by rolling.(Left, Right or Right to Left).
The image will them move to the stamp as is.
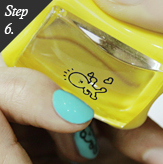
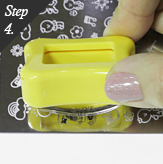
Lightly roll the image on the stamp to your nail to stamp again. (Left to Right or Right to left)
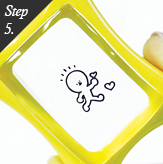
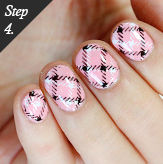
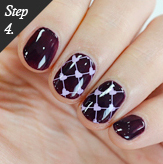
Finish with a top coating for the image to last for a long time and for its color to remain vivid. (If you have stamped on a gel nail, cure it with a top gel.)
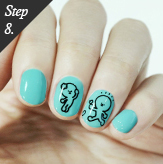
Complete the delicate Stamping nail art.
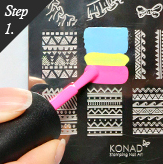
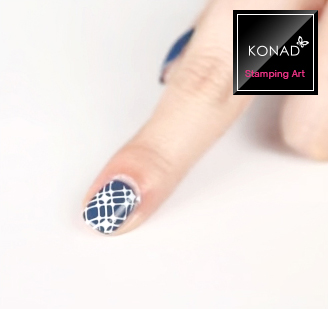
Apply various colors on your desired image plate.

Erect the scraper at 45” and quickly scrape the covered polish from left to right.
Stamp the image moved on the stamp to a nail by rolling.
You can thus do stamping nail at with various colors.
Apply more than two colors that you want gradation to your desired image plate. (Apply in your desired direction tjo create various patterns.)
Erect the scraper at 45” and quickly scrape for several times the covered polish from left to right for gradation.
You can thus do gradation stamping nail art.
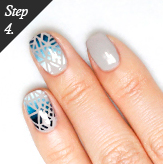
Image showing how to apply nail art.
Choose a color and apply it on the image plate of your choice.
Erect the scraper at 45* and quickly scrape the covered polish from left to right.

Use two different colors and stamp them in different direction on the nails.
Overlay stamping art completed!
Apply more than two colors that you want gradation to your desired image plate. (if the color is of a dark shade, use only a small amount.)
Hold the scrapper at 45* and scratch the applied polish from left to the right several times quickly so that it can be mixed before drying.

Stamp the image moved on the stamp to a nail by rolling.
Color mixing stamping nail art completed!
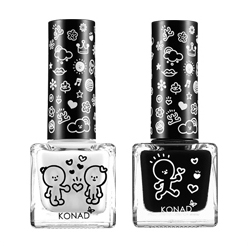
![Gift Set [KONAD X BARABAPA] Clear Gelly Stamping Kit- Honeymoon](https://konadbeauty.com/image/cache/catalog/products/StampingSet/konad_stamping_570x500_Honeymoon-570x500.jpg "Gift Set [KONAD X BARABAPA] Clear Gelly Stamping Kit- Honeymoon")
![Gift Set [KONAD X BARABAPA] Clear Gelly Stamping Kit- Honeymoon](https://konadbeauty.com/image/cache/catalog/products/Gift%20Shop/konad-570x500_CardB1-570x500.jpg "Gift Set [KONAD X BARABAPA] Clear Gelly Stamping Kit- Honeymoon")
![Gift Set [KONAD X BARABAPA] Clear Gelly Stamping Kit- Honeymoon](https://konadbeauty.com/image/cache/catalog/products/Gift%20Shop/konad-570x500_Clear-Jelly-stamping-nail-gift-set-570x500.jpg "Gift Set [KONAD X BARABAPA] Clear Gelly Stamping Kit- Honeymoon")
![Gift Set [KONAD X BARABAPA] Clear Gelly Stamping Kit- Honeymoon](https://konadbeauty.com/image/cache/catalog/products/Gift%20Shop/konad-570x500_BouquetB-570x500.jpg "Gift Set [KONAD X BARABAPA] Clear Gelly Stamping Kit- Honeymoon")
![Gift Set [KONAD X BARABAPA] Clear Gelly Stamping Kit- Honeymoon](https://konadbeauty.com/image/cache/catalog/products/Gift%20Shop/20190330_184454-570x500.jpg "Gift Set [KONAD X BARABAPA] Clear Gelly Stamping Kit- Honeymoon")
![Gift Set [KONAD X BARABAPA] Clear Gelly Stamping Kit- Honeymoon](https://konadbeauty.com/image/cache/catalog/products/Gift%20Shop/konad-570x500_BouquetA-570x500.jpg "Gift Set [KONAD X BARABAPA] Clear Gelly Stamping Kit- Honeymoon")
![Gift Set [KONAD X BARABAPA] Clear Gelly Stamping Kit- Honeymoon](https://konadbeauty.com/image/cache/catalog/products/Gift%20Shop/konad-570x500_CardA-570x500.jpg "Gift Set [KONAD X BARABAPA] Clear Gelly Stamping Kit- Honeymoon")
![Gift Set [KONAD X BARABAPA] Clear Gelly Stamping Kit- Honeymoon](https://konadbeauty.com/image/cache/catalog/products/Gift%20Shop/konad-570x500_BouquetE-570x500.jpg "Gift Set [KONAD X BARABAPA] Clear Gelly Stamping Kit- Honeymoon")
![Gift Set [KONAD X BARABAPA] Clear Gelly Stamping Kit- Honeymoon](https://konadbeauty.com/image/cache/catalog/products/Gift%20Shop/konad-570x500_BouquetD-570x500.jpg "Gift Set [KONAD X BARABAPA] Clear Gelly Stamping Kit- Honeymoon")
![Gift Set [KONAD X BARABAPA] Clear Gelly Stamping Kit- Honeymoon](https://konadbeauty.com/image/cache/catalog/products/Gift%20Shop/konad-570x500_BouquetC-570x500.jpg "Gift Set [KONAD X BARABAPA] Clear Gelly Stamping Kit- Honeymoon")
